|
Back to Part 1
Building the Port Side
Installing the Port Scuppers
Cutting and Installing the
Caprail
Building the Port Bulwark
I started by marking an inch parameter
on deck in from the edge of the toerail, and two inches on the topsides down
from the edge of the deck. These marks designate where I will grind. Then I
began grinding off the Awlgrip and the gelcoat from these areas. I want to
see good, solid fiberglass before I start building the bulwarks,
 Here
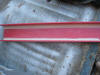
is the existing toerail. Here
is the existing toerail.
 Here
I have ground thru the gelcoat down to the fiberglass on the hull flange. Here
I have ground thru the gelcoat down to the fiberglass on the hull flange.
 Here
I have begun grinding the deck side of the torail. Here
I have begun grinding the deck side of the torail.
 Here
is a shot of the topsides with the gelcoat removed by my Festool. You have
to get all the gelcoat off if you want the bond of new fiberglass to be
strong. I also take the Awlgrip off below the cove stripe since I plan to
fill the cover stripe with epoxy. Here
is a shot of the topsides with the gelcoat removed by my Festool. You have
to get all the gelcoat off if you want the bond of new fiberglass to be
strong. I also take the Awlgrip off below the cove stripe since I plan to
fill the cover stripe with epoxy.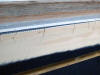
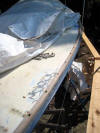
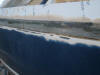
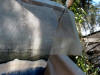
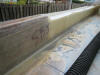
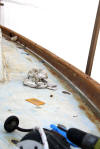
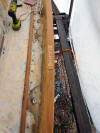
One of the issues I have had with my
Bristol for a long time is that of cracks along the turn of the hull like
these in the photo. I don't know if other Bristol owners have similar
problems--I sail my boat very hard which I think contributes to the cracks.
In the past I have tried filling them when I had the boat repainted, but they
reappeared. It is only the gelcoat cracking. I think the yard, at least for
my boat, made the flange joint extra thick with gelcoat and it simply tends
to crack there. The cracks do not extend into the fiberglass.
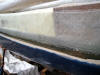
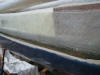
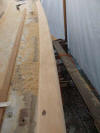
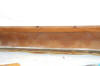
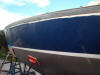 Here
is the topsides finished. Here
is the topsides finished.
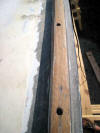
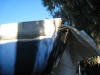
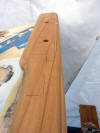
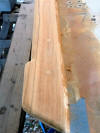
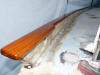
 Here
is the deck edge tapered for fiberglassing and I have fresh sanded the teak
toerail. At this point I will begin cutting the teak hawse pipe braces,
forward, amidships and aft. Fit them, clue them in place and thru bolt them. Here
is the deck edge tapered for fiberglassing and I have fresh sanded the teak
toerail. At this point I will begin cutting the teak hawse pipe braces,
forward, amidships and aft. Fit them, clue them in place and thru bolt them.
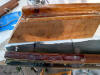
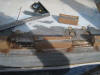
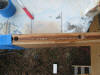
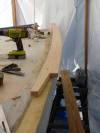
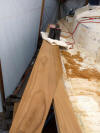
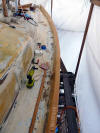
Next, I began fashioning the forward,
amidships and stern hawse pipe braces out of teak. As with the starboard
side I glued two plants together to get the thickness I needed: the inside
plank an inch shorter to account for the toerail. Here are some shots.
 |
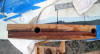
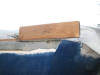
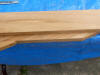
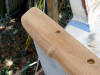
Here is the bow hawse pipe
brace. |
 |
Checking the vertical angle
of the bow brace to match the starboard side. |
 |
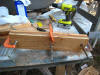
I decided to
try West System's Six-Ten epoxy. It comes loaded in a caulking tube
and mixes as you pump the caulking gun. It is said to be more water
resistant and more flexible than the original epoxy. Frankly I could
not be more happy with the original stuff but it's nice to not have
to load up caulking tubes. |
 |
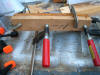
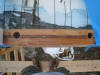
Here is the amidships hawse
pipe brace glued and clamped. |
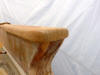
 |
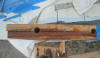
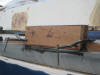
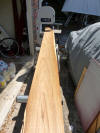
And here is the stern hawse
pipe brace. Notice it extends past the stern a good 5 inches. That
will give me enough material to cut the angle of the transom into
the aft facing edge of the brace. |
 Then
as the Six-Ten began to kick, I measured for the scuppers on either side of
the Then
as the Six-Ten began to kick, I measured for the scuppers on either side of
the
 amidships
hawse pipe. The scuppers are each 3 inches wide, separated by 4-1/4 inches
and are 9-1/4 inches fore and aft of the brace. I found several hull to amidships
hawse pipe. The scuppers are each 3 inches wide, separated by 4-1/4 inches
and are 9-1/4 inches fore and aft of the brace. I found several hull to
 deck
flat head screws which all were tightened an addition quarter turn. I dug
out the mastic that seals the hull to deck joint and cleaned everything up
with acetone. Then I spooned a loose mix of epoxy and 404 high density
filler into the gap that the mastic filled. I will sand everything when the
epoxy hardens. deck
flat head screws which all were tightened an addition quarter turn. I dug
out the mastic that seals the hull to deck joint and cleaned everything up
with acetone. Then I spooned a loose mix of epoxy and 404 high density
filler into the gap that the mastic filled. I will sand everything when the
epoxy hardens.
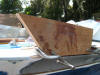
 The
next step is to cut the foam bulwarks that will fit between the teak hawse
pipe braces. I used my table saw to cut 4 pieces each 8' long, and notched
for the toerail. I pealed the plastic protection sheets off both
sides--gluing to the sheets would do no good at all. Then I wet out the top
and outside edge of the teak toerail, and to top The
next step is to cut the foam bulwarks that will fit between the teak hawse
pipe braces. I used my table saw to cut 4 pieces each 8' long, and notched
for the toerail. I pealed the plastic protection sheets off both
sides--gluing to the sheets would do no good at all. Then I wet out the top
and outside edge of the teak toerail, and to top
 edge
of the hull to deck joint. I used the West Six-10 epoxy to run beads of glue
down the rabbit I cut for edge
of the hull to deck joint. I used the West Six-10 epoxy to run beads of glue
down the rabbit I cut for
 the
toerail, and over the toerail. When everything was ready I pressed the foam
boards the
toerail, and over the toerail. When everything was ready I pressed the foam
boards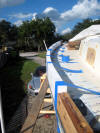 down onto the toerail and taped it place.
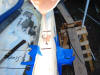
 Next,
I drilled holes into the three teak hawse pipe braces to thru-bolt them with
5/16" 316 stainless carriage bolts. I won't bolt them down until after the
epoxy has hardened for about a week or more. Next,
I drilled holes into the three teak hawse pipe braces to thru-bolt them with
5/16" 316 stainless carriage bolts. I won't bolt them down until after the
epoxy has hardened for about a week or more.
 Finally,
I ran a fillet if the Six-10 epoxy along the inside of the toerail, and used
some thickened epoxy to fair the outside of the joint between the topsides
and the foam. I would have liked to glass in the foam today but rain
threatened so I will do that next weekend. Finally,
I ran a fillet if the Six-10 epoxy along the inside of the toerail, and used
some thickened epoxy to fair the outside of the joint between the topsides
and the foam. I would have liked to glass in the foam today but rain
threatened so I will do that next weekend.
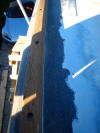
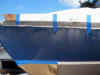
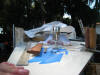
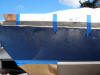
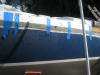
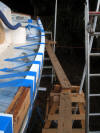
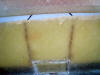
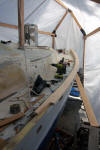
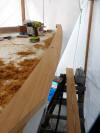
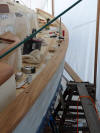
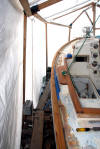
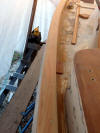
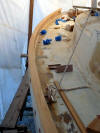
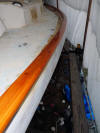
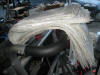 This
weekend I applied two layers of 24 oz biax tape and 1 layer of 6 oz cloth to the inside of the bulwarks. I will
apply the same lay up schedule to the outside next weekend. You can see some
of the lay-up schedule for the port bulwark in the photo. More pictures to
follow. This
weekend I applied two layers of 24 oz biax tape and 1 layer of 6 oz cloth to the inside of the bulwarks. I will
apply the same lay up schedule to the outside next weekend. You can see some
of the lay-up schedule for the port bulwark in the photo. More pictures to
follow.
The steps to glassing the inside
follow:
-
I painted the inside of the bulwark
and about three inches onto the deck with epoxy using the extra slow
hardener. The temp at this point was around 78 degrees. I
thickened this mix with some 404 high density hardener but the mixture
still remained runny. The thickener helps fill the small irregularities
in the surface of the Styrofoam. I let the bulwark sit for about 20
minutes.
-
I wet out the first layer of biax
with unthickened epoxy mixed with the extra slow hardener. I laid on the
biax strips, each about 6" wide and overlapped the side deck by about
3/4".
-
I wet out the second layer of biax
with unthickened epoxy mixed with the slow hardener. I laid these strips
on, overlapping the side deck by about 1-1/4".
-
I wet out the third layer, of 6 oz
cloth tape 8" wide) with unthickened epoxy mixed with the fast hardener.
I laid the tape on to overlap the side deck by about 2". The
purpose of the cloth is not so much structural as it is to provide a
smoother surface than the biax with is very rough and requires a lot of
fairing.
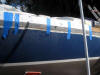
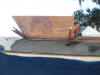
 Here
is the inside of the bulwark glassed with two layers of 24 oz. biax and one
layer of 6 oz cloth. Here
is the inside of the bulwark glassed with two layers of 24 oz. biax and one
layer of 6 oz cloth.
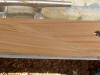
 The
outside of the bulwark with the same layup schedule. The
outside of the bulwark with the same layup schedule.
 Finally,
I trimmed off the excess from the stern hawse pipe brace. Finally,
I trimmed off the excess from the stern hawse pipe brace.
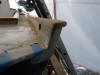
 I
used a Japanese saw and trimmed the brace to the shape of the stern. Here
you can see how if follows the same shape. I
used a Japanese saw and trimmed the brace to the shape of the stern. Here
you can see how if follows the same shape.
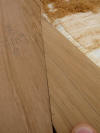
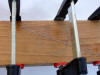
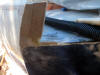 In
this photo you can see the cross section of teak and glass. In
this photo you can see the cross section of teak and glass.
Here are some additional photos and
commentary about building the bulwarks. The specifics of the process are
covered in the starboard bulwark webpage.
 |
This is the bow hawse pipe
brace. Made up of two 1" thick pieces of teak, epoxied together, |
 |
Clamped for position so I
can compare it to the starboard hawse pipe brace. |
 |
I'm just comparing the
vertical angle of each side of the bulwarks here. |
 |
I have pumped West System
Six10 thickened epoxy onto both surfaces. |
 |
The bow hawse pipe brace
glued and clamped. |
 |
The photo shows the
mounting holes drilled for the 5/16" 316 stainless carriage bolts I
use to mount the bow hawse pipe brace. The thru-bolting is
done only after the braces are glued in place, and all the
fiberglass layup is complete. The holes are filled with thickened
epoxy, the carriage bolts are pushed into this mess, the threads
cleaned off down below, and the nuts are tightened thoroughly and
Lok-tite is used for security. |
 |
This shot just shows the
fit and how everything lines up nicely relative to the toerail and
hull to deck flange. The holes are countersunk enough to account for
trimming the bulwark to its final sheer height, and an inch below
that line so that I can screw the teak caprail into the top of the
brace without having to worry about hitting one of the carriage
bolts. |
 |
The amidships hawse pipe
brace being glued up. |
 |
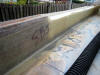
I made a point of marking
where each of the toerail screws is and when locatable, where the
hull to deck screws are. |
 |
The amidships hawse pipe
brace glued with Six10 and clamped. |
 |
Mounting holes drilled for
the amidships hawse pipe brace. |
 |
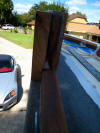
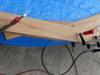
The stern hawse pipe brace
being built. It has to be longer than the other two to accommodate
the angle of the transom when it is trimmed. |
 |
The stern hawse pipe
brace glued with Six10 and clamped. |
 |
Mounting holes drilled for
the stern hawse pipe brace. |
 |
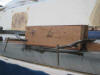
Here is how I position the
2" foam between the braces glue it with Six10 and hold it in
position with blue tape. |
 |
More tape. |
 |
More tape. |
 |
Tape. |
 |
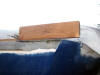
After the epoxy is hardened
for the foam bulwark, I carefully shape the outside upper edge,
relieving it just a bit to help give it a slight round. The foam
shapes very easily using a palm sander and 80 grit sandpaper, but be
careful to not take too much off. Then I faired the edge of the
flange and down some onto the topsides to provide an even surface to
fiberglass to. |
 |
A shot of the inside of the
bulwark with three layers of fiberglass in place. Again, disregard
the top edge as about an inch or more of that will be removed with
the final trimming to establish the sheer. |
 |
A shot of the outside of
the bulwark with three layers of glass. |
 |
Using my Japanese saw to
trim the aft stern hawse pipe brace even with the angles of the
transom. |
| |
|
| |
|
Installing the Port Scuppers
 I
used the fiberglass "C" section I bought from McMaster Carr and that I used
on the starboard side. First I
used the fiberglass "C" section I bought from McMaster Carr and that I used
on the starboard side. First
 I
filled the inside corners with a thin fillet and let it set up in the sun.
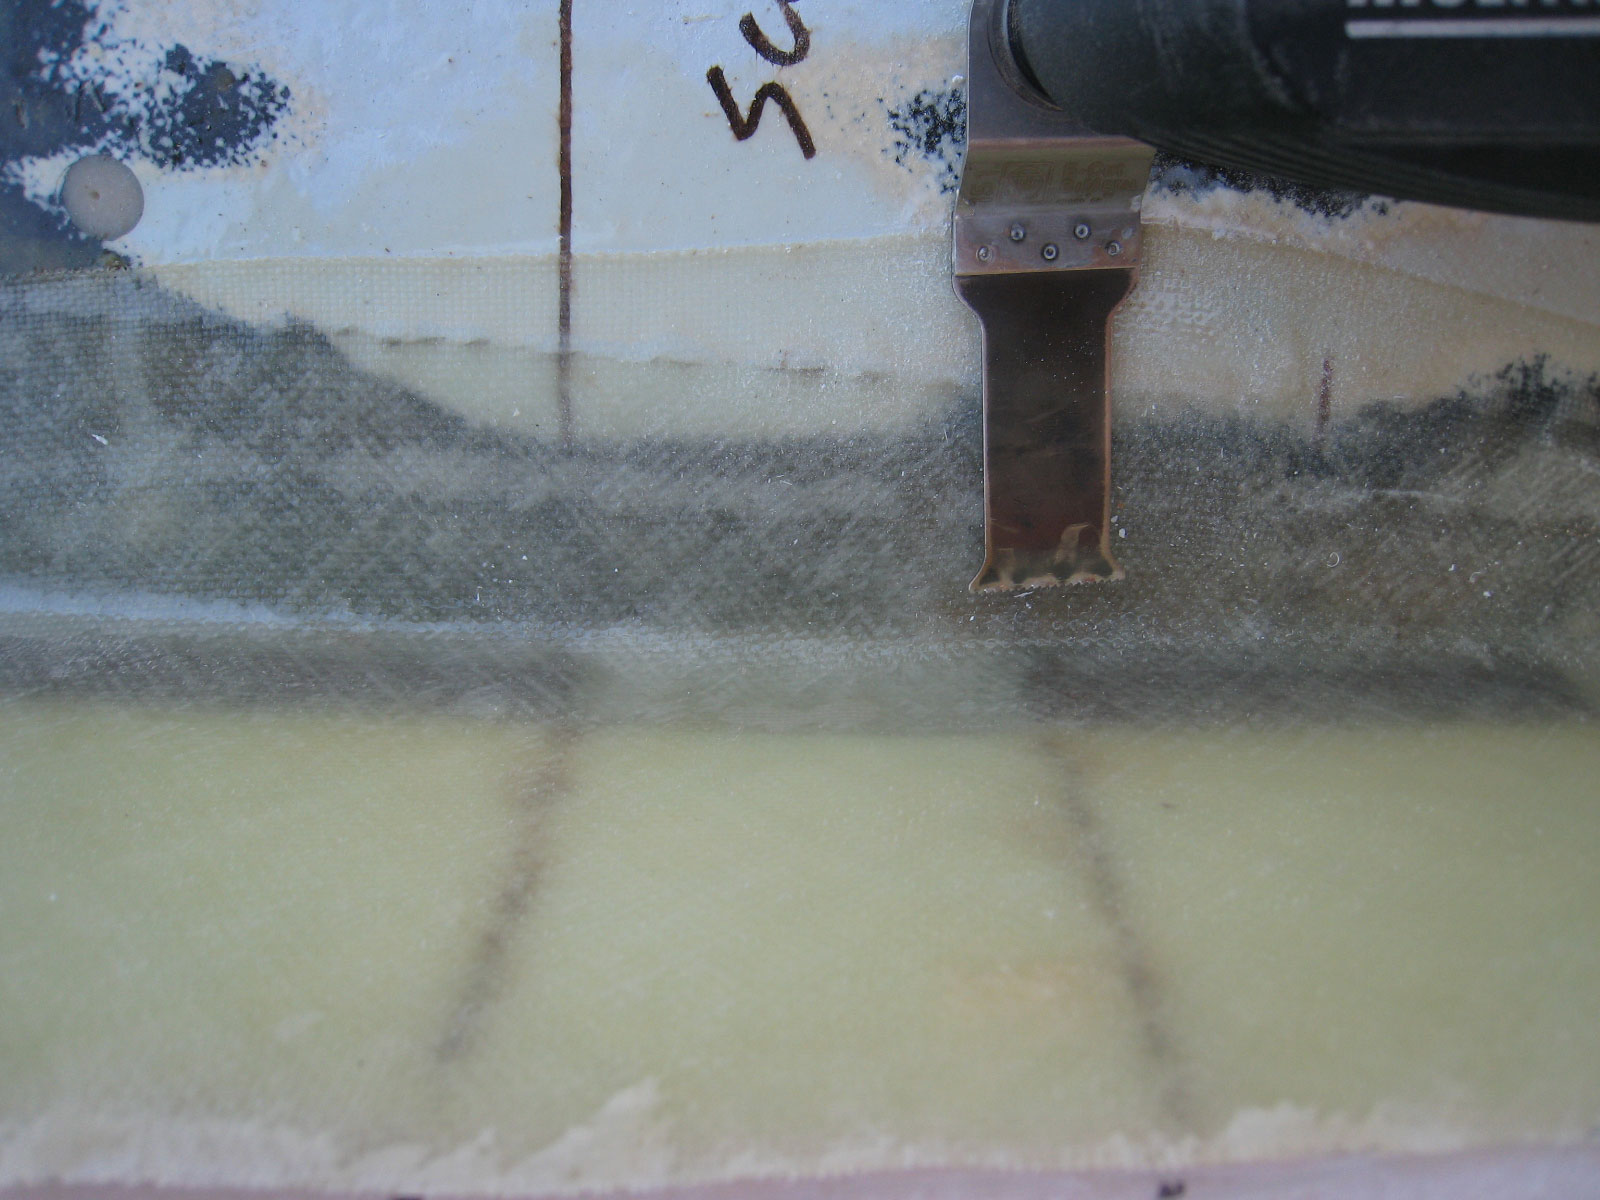
Later I will cut off 3" sections to fit thru the bulwark. Next, I cut the
openings I
filled the inside corners with a thin fillet and let it set up in the sun.
Later I will cut off 3" sections to fit thru the bulwark. Next, I cut the
openings
 using
my Fein Multimaster. I had marked on deck where I had cut openings in the
toerail before installing the bulwark. The Fein made short, easy and
controllable work of it. using
my Fein Multimaster. I had marked on deck where I had cut openings in the
toerail before installing the bulwark. The Fein made short, easy and
controllable work of it.
I cut the "C" section into 3" lengths
and installed each--they were proud on each side of the bulwark--and
carefully taped around the opening. I drilled a hole down thru the top of
the Styrofoam and slowly poured
 thickened
epoxy with 404 high density filler. I used a extra slow hardener because the
epoxy will exotherm in such an enclosed space and melt the foam. The extra
slow hardener gave me plenty of pot time and did not heat up as it hardened. thickened
epoxy with 404 high density filler. I used a extra slow hardener because the
epoxy will exotherm in such an enclosed space and melt the foam. The extra
slow hardener gave me plenty of pot time and did not heat up as it hardened.
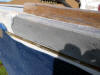
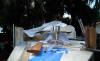
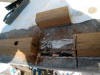
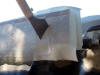
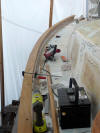
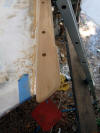
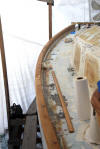
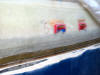 Here
is the outside of the scuppers embedded in thickened epoxy (sorry for the
camera shake). It will be sanded fair to the side of the bulwark. Here
is the outside of the scuppers embedded in thickened epoxy (sorry for the
camera shake). It will be sanded fair to the side of the bulwark.
Cutting and Installing the
Caprail
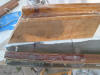
The caprail will be from the matching
teak plantation stock used for the caprail on the stern bulwark and for the
cockpit coamings and covering boards. It is 7/8" thick and the boards for
the caprail are 9' long and 7-1/2" wide.
 Before
breaking out the teak boards I decided to "practice" using some relatively
inexpensive milled pine from Lowes--boards 3/4" thick, 8' long and 7" wide.
I positioned the first board at the starboard bow, pinned it with some
temporary screws and scribed the curve of the bulwark, giving myself an inch
margin outside and about 3/8" inside. Then I rough cut the curve on the band
saw and installed. I used a template to mark the one side of the scarf join,
removed the board, cut the scarf with a hand saw and reinstalled the board. Before
breaking out the teak boards I decided to "practice" using some relatively
inexpensive milled pine from Lowes--boards 3/4" thick, 8' long and 7" wide.
I positioned the first board at the starboard bow, pinned it with some
temporary screws and scribed the curve of the bulwark, giving myself an inch
margin outside and about 3/8" inside. Then I rough cut the curve on the band
saw and installed. I used a template to mark the one side of the scarf join,
removed the board, cut the scarf with a hand saw and reinstalled the board.
 I
followed the same procedure for the second board. I overlaid the forward end
of the I
followed the same procedure for the second board. I overlaid the forward end
of the
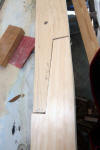 second
board on top of the scarf joint and traced it onto the underside, then again
cut the matching scarf with a hand saw. Then attaching temporarily to the
bulwark. As you can see, the scarf is unsatisfactory--mostly attributable to
my lack of skill with a handsaw. The next scarf I will cut using my Bosch
jig saw and straight-edge guides. second
board on top of the scarf joint and traced it onto the underside, then again
cut the matching scarf with a hand saw. Then attaching temporarily to the
bulwark. As you can see, the scarf is unsatisfactory--mostly attributable to
my lack of skill with a handsaw. The next scarf I will cut using my Bosch
jig saw and straight-edge guides.
 For
the next board I added, I used a simpler diagonal cut scarf, cut with a
straight edge and my router. Since the boards are not bent to For
the next board I added, I used a simpler diagonal cut scarf, cut with a
straight edge and my router. Since the boards are not bent to
 the
shape of the bulwarks, but the shape is sawed, there should be no tension on
the scarfs. I will add two dominos to strengthen the joint. Finally I did
some experimental shaping to the third board: the results of which helped me
to decide the caprails' final width (complicated by the fact that the port
bulwark is 1/8" wider than the starboard bulwark) In order to not cut the
port bulwark wider which would obviously point out this difference, I plan
to cut the outboard overlap of the port side 1/8" less than the starboard
side (5/8 to port and 3/4 to starboard). That will ensure that two caprails
are the same width, and the overlap would really not be comparable with the
boat in the water. The inside edge of the caprails will be cut 1/8" proud of
the flush inside, rounded at the top with a 3/8" round over bit. The
outboard edge will be rounded on the top with a 1/2" round-over bit and
underneath with a 1/4" bit. The round-over's for the captail are the same as
the round-over's for the covering boards in the cockpit.
The caprails are attached by gluing them to the tops of the
bulwarks in thickened epoxy. The bulwark stops are three layers of 6 oz
fiberglass expoxied in place tying together the sides to the tops of the
foam and teak braces. Then the caprails are screwed down on 24” centers to
the teak braces. I will use #14 screws long enough to screw into the hull to
deck flange. the
shape of the bulwarks, but the shape is sawed, there should be no tension on
the scarfs. I will add two dominos to strengthen the joint. Finally I did
some experimental shaping to the third board: the results of which helped me
to decide the caprails' final width (complicated by the fact that the port
bulwark is 1/8" wider than the starboard bulwark) In order to not cut the
port bulwark wider which would obviously point out this difference, I plan
to cut the outboard overlap of the port side 1/8" less than the starboard
side (5/8 to port and 3/4 to starboard). That will ensure that two caprails
are the same width, and the overlap would really not be comparable with the
boat in the water. The inside edge of the caprails will be cut 1/8" proud of
the flush inside, rounded at the top with a 3/8" round over bit. The
outboard edge will be rounded on the top with a 1/2" round-over bit and
underneath with a 1/4" bit. The round-over's for the captail are the same as
the round-over's for the covering boards in the cockpit.
The caprails are attached by gluing them to the tops of the
bulwarks in thickened epoxy. The bulwark stops are three layers of 6 oz
fiberglass expoxied in place tying together the sides to the tops of the
foam and teak braces. Then the caprails are screwed down on 24” centers to
the teak braces. I will use #14 screws long enough to screw into the hull to
deck flange.
Here are the steps to fitting and
installing the caprails : :
-
Lay the first board over the
bulwark, temporarily secure and scribe the inside and outside edges.
-
Cut the caprail and attach with
screws.
-
Scribe the joint bevel on the aft
end of the caprail.
-
Rough cut the bevel 1/8” proud of
the line.
-
Cut to the line using a flush cut
router bit.
R e-attach
the board, overlay the forward end of the second board, and scribe the
underside of the second board with the bevel.
Rough cut the bevel 1/8” proud and
cut to the line using a flush cut router bit.
Re-position the second board so the
scarf joint is tight, and scribe the inside and outside edges.
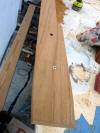
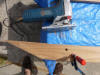
 Here
is the first of the Here
is the first of the
 starboard
teak boards rough cut to fit the curve of the bulwark. For the forward
section of the caprail--the first 14 inches I increased the width by 3/4" on
the inside, just as an aesthetic feature. The inside edge for the remainder
will be flush cut. I then cut the end in a bevel that I will duplicate for
the adjoining board. starboard
teak boards rough cut to fit the curve of the bulwark. For the forward
section of the caprail--the first 14 inches I increased the width by 3/4" on
the inside, just as an aesthetic feature. The inside edge for the remainder
will be flush cut. I then cut the end in a bevel that I will duplicate for
the adjoining board.
 |
Here you can see I am beginning to fit the second section on the
starboard side. I laid the second board on top of the first and
scribed the bevel on the underside. I cut the bevel (more about how
I did this in a moment) and then refitted it in place (good use of
old battery). I then scribed the inside and outside edges. |
 |
Here is a close up of the joint. |
 |
Preparing to saw the caprail section. |
 |
Here, I have rough cut the diagonal for the scarf with my jig saw,
leaving about an 1/8" proud. |
 |
I
am about to trip the diagonal with my flush bit on the router. I
have laid a known, true straight edge over the caprail board and
clamped it in place. |
 |
To
keep the end from breaking out, I butted a scrap piece of teak
against the edge and continued the trim cut into the scrap. |
 |
Here is the finished cut from the router. |
 |
Screwing the caprail pieces in place as I go. |
 |
To
glue the scarfs I first cut domino mortises, slathered on thickened
epoxy, and |
 |
clamped them tight. |
|
 |
The same scarf after a bit of light sanding. The scarfs were all
glued with the caprails not screwed in place so as not to stress the
joints while the epoxy cured. After two days of hot weather I
screwed the caprail back in place in preparation for final routing. |
 |
Here, I am almost finished with rough cutting and fitting the port
caprail. |
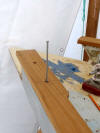 |
This
is a 6" long #14 self tapping screw that will attach the caprail to
the bulwarks. I am using lengths of screws to pass all the way down
through the bulwark and through the hull to deck joint, to tie
everything very strongly together. So at the bow where the bulwark
is 5" tall I use a 6" screw, etc. |
 |
Aft detail. |
 |
Aft Detail. |
 |
Aft detail. |
 |
Final machining and sanding;
ready for gluing. |
 |
Forward detail. |
 |
Forward detail. |
 |
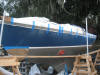
The port
caprail glued and screwed. It too about an hour to mix and
spread the batches of epoxy before positioning the caprail. |
 |
The temp inside the enclosure
was marginal, around 88 degrees and even using the slowest setting
hardener it almost overtook my efforts. |
 |
The caprail is screwed with
screws long enough to reach through the bulwark and through the
fiberglass flange, adding additional strength to the bulwark and
tying everything together. |
 |
The caprail gives me almost
another inch of height to the bulwarks. |
 |
The bungs were trimmed with a zero kerf Japanese saw
and lightly sanded. |
 |
|
 |
|
 |
Finished up bunging and sanding the caprails today. Here is the
starboard boarding step in position. |
 |
The caprail and the boarding
step. |
 |
All ready for the first coat of
epoxy. |
 |
First coat of epoxy. |
 |
Starboard bow. |
|