|
One of the
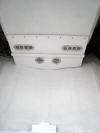
great features of the Bristol 29 is her lazarette. It's like a small garage;
you could turn it into a small stateroom for the kids. It is large enough to
step into and work under the aft deck and side decks and offers a lot of
storage. However, there is no provision to keep stowed gear from banging
around and the angle of the hull at the stern is such that it is not
especially safe to stand in the lazarette in any kind of a seaway. So for
this refit I will improve the lazarette by adding:
-
Floorboards that can be removed quickly in an emergency
-
Some
sort of storage system,
-
New
wiring and,
-
Other
things that I haven't yet thought of.
Floorboards
 The
first order of business is to fashion a level brace against the inside of
the transom. So I took some pine 2x4 material and cut a small block, shaped
to the angles of the transom and the two The
first order of business is to fashion a level brace against the inside of
the transom. So I took some pine 2x4 material and cut a small block, shaped
to the angles of the transom and the two sides of the bottom. I positioned it level in both orientations in some
thickened epoxy and let it cure. Then I shaped a slightly longer piece
out of pine, with the same angle as the transom to sit on top of the block.
Again, I
 encapsulated
everything in epoxy and let it cure. Finally, I took a piece of scrap teak,
longer still, shaped the back edge to the angle of the transom and epoxied
it in place. Later I glassed the edges of the teak brace with several layers
of 6 oz fiberglass tape. encapsulated
everything in epoxy and let it cure. Finally, I took a piece of scrap teak,
longer still, shaped the back edge to the angle of the transom and epoxied
it in place. Later I glassed the edges of the teak brace with several layers
of 6 oz fiberglass tape.
 To
fill the deep vee cavity where the two sides of the hull come together, I
shaped a 40" piece of pine roughly to the same shape and sat it in thickened
epoxy and then filled the side To
fill the deep vee cavity where the two sides of the hull come together, I
shaped a 40" piece of pine roughly to the same shape and sat it in thickened
epoxy and then filled the side edges flush with the hull form. Finally to strengthen everything and give a
fair surface I glassed over the board and the bottom of the hull
 with
three layers of 24 oz biax. After the biax cured, I sanded everything smooth
to eliminate the splinter glass edges and faired everything smooth with
thickened epoxy. with
three layers of 24 oz biax. After the biax cured, I sanded everything smooth
to eliminate the splinter glass edges and faired everything smooth with
thickened epoxy.
 Next,
I cut some 1/2 plywood to create an extension down to the hull of the
forward bulkhead. I encapsulated it in epoxy and painted it. Then, since I
had a few Perko Next,
I cut some 1/2 plywood to create an extension down to the hull of the
forward bulkhead. I encapsulated it in epoxy and painted it. Then, since I
had a few Perko
 vent
grills laying around, I cut some vent holes and fastened the grills in
place. The horizontal cleat will serve as the forward brace for vent
grills laying around, I cut some vent holes and fastened the grills in
place. The horizontal cleat will serve as the forward brace for
 the
floorboard. Finally, I glued down some cleat stock that I will attach some
eye straps to to lash some webbing in place. the
floorboard. Finally, I glued down some cleat stock that I will attach some
eye straps to to lash some webbing in place.
 For
the floorboard, I used a 24" x 24" 1/2" thick plywood, and two poplar
fiddles. For
the floorboard, I used a 24" x 24" 1/2" thick plywood, and two poplar
fiddles.
 I
encapsulated the whole thing in epoxy an so far have painted it with epoxy
primer. It fits nicely in place and I ordered some nice brass barrel bolts
to lock it down for my turn it upside down and shake test. I
encapsulated the whole thing in epoxy an so far have painted it with epoxy
primer. It fits nicely in place and I ordered some nice brass barrel bolts
to lock it down for my turn it upside down and shake test.
|
