|
Buying the ports
Replacing the forward hatch
The original ports on the
Bristol 29 are fair weather things at best. They are aluminum, only two
open; those in the forward cabin. The Plexiglas and polycarbonate is fogged
and scratched beyond repair. A number of the mounting screws are stripped.
And they leak.
As far as I can gather
they were build as a custom order for Bristol Yachts, and used in a number
of their boats. The doghouse deadlights with angled fore and aft
vertical sides are a trademark of Bristol. As a matter of fact, the design
of the ports in most any production boat is one of a boat's most
distinguishing features: the small round ports of Westsail 32's, the large
number of stainless rectangular ports of Valiant's and Endeavor's--almost
every make has its unique set of ports. I suppose that is one of the reasons
I have been reluctant to replace the ports in the B29. On the other hand, I
think the ports in the forward cabin are too large for the cabin sides and
the fixed doghouse portlights are too large and in the B29's case, much too
weak for my tastes.
So I have decided to replace all the ports.
The question still begs what to use instead. Bronze or stainless steel?
Round or rectangular or oval? Fixed or opening? Glass or plexi? All are
questions I have pondered and pretty much worked down to the following
rules. They must not leak. They must all open. They must be smaller than
what is in the boat now. They must not leak. They must drain water off
before you open them. They must have replacement parts available. They must
not leak.
Buying the ports
(Mar 1, 2005)
I ordered my ports from
Bluewater Hardware (formerly Mariner's Hardware). I selected 5" round stainless steel for the four
forward ports, and 7x14" oval stainless for the doghouse ports. All eight
are opening with screens. All are 316 s/s. All contain 5/16" tempered safety
glass. They all have adjustable hinges. And, Scott at Mariner's Hardware
gave me a very attractive discount off list. I have measured the trapezoid
forward hatch and he is working up an estimate for a custom stainless hatch.
 Forward
ports Forward
ports
 Doghouse
ports - 7x14 Oval - These ports are smaller than the fixed lights standard
on the B29. Here are some details of the Mariner's Hardware ports: Doghouse
ports - 7x14 Oval - These ports are smaller than the fixed lights standard
on the B29. Here are some details of the Mariner's Hardware ports:
 Opened,
showing details of the stainless steel screen, the opened dogs and the beefy
gasket. Opened,
showing details of the stainless steel screen, the opened dogs and the beefy
gasket.
 Showing
the hinge adjustment set screw to adjust pressure on the top of the gasket. Showing
the hinge adjustment set screw to adjust pressure on the top of the gasket.
 Showing
details of the screen (included in the price). The screen is 316 stainless
just like the ports, with wire handles for ease in removing it and a rubber
gasket around the edge (no rattling and no bugs). Showing
details of the screen (included in the price). The screen is 316 stainless
just like the ports, with wire handles for ease in removing it and a rubber
gasket around the edge (no rattling and no bugs).
 Showing
the massive gasket for the port. Showing
the massive gasket for the port.
I have to say that even though these ports are a
big investment, they are also a great asset, giving me security to sail
offshore I haven't had before. And, they will greatly improve the looks of
Sally B (and her ventilation!). The original aluminum ports have
deteriorated to the point that they are an eyesore.
So the steps to replace the ports in the Bristol
are as follows:
-
Remove the old ports.
-
Removed the
interior cabin
liner.
-
Fill in the holes left by the old ports. This
step entails probably more work to the boat than anything else I will do.
Not only will I fill in the existing cutouts, but strengthen the inside of
the cabin sides with two layers of 1/4" plywood. I
have decided to use 3/4-in Styrofoam and 1/4-in cherry plywood.
-
Fair the outside of the cabin sides and paint.
-
Cut new holes and mount ports.
Replacing the forward hatch
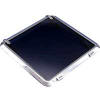 Here
is the hatch and their specs. Here
is the hatch and their specs.
- Highly polished 316 stainless
- Low profile
- No fasteners visible when closed
- Tough, glare resistant, 1/2" thick acrylic top
- Oil-resistant neoprene gaskets
- 316 stainless snag-free outside handles
- Inside locking
I made a template of the opening today and will
FedEx it off to Manship marine tomorrow and will be the basis of the design for the new hatch.
It will be about 6 weeks for the ports and
hatches to arrive from Taiwan. Stay tuned...
 After
getting the
headliner out, I used my 4" Hitachi grinder to create a 10/1 bevel
around each of the port openings. I will build up layers of glass--each
layer overlapping more of the bevel than the previous layer until I am back
to the original thickness. I need to buy some smooth faced Formica to screw
to the outside of each port--stay tuned for more details. After
getting the
headliner out, I used my 4" Hitachi grinder to create a 10/1 bevel
around each of the port openings. I will build up layers of glass--each
layer overlapping more of the bevel than the previous layer until I am back
to the original thickness. I need to buy some smooth faced Formica to screw
to the outside of each port--stay tuned for more details.
This weekend promises warm dry weather
so I started preparing to glass in the holes in the cabin sides.
 First
I made three templates, one First
I made three templates, one of the large openings in the doghouse, one for the three smaller port
openings and one for the head, which is slightly smaller. The templates are
cut from carpenters paper, a heavy Kraft paper.
Next, I laid out the templates on 24 oz
stitched woven roving and mat. I marked and cut
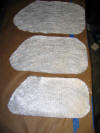 three
patterns for each port, each one slightly larger to overlap and fill the
bevel I cut around each of the ports. I'm
not sure what the thickness of the three layers will be until I do the lay
up. The idea is to bring the layers out even with the surrounding glass.
Then add a layer of 3/4" foam and finish the sides in 1/4 ash plywood. three
patterns for each port, each one slightly larger to overlap and fill the
bevel I cut around each of the ports. I'm
not sure what the thickness of the three layers will be until I do the lay
up. The idea is to bring the layers out even with the surrounding glass.
Then add a layer of 3/4" foam and finish the sides in 1/4 ash plywood.
To make the outside of the glassed
holes as smooth as possible I need to cover the holes with a smooth
material. At first I was planning to use shinny Formica covered with wax
paper as a mold release. But I
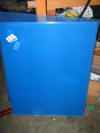 found
inexpensive acrylic sheets at Home Depot, which will work just as well, and
since the sheets are covered with a plastic film to prevent scratches, the
film will found
inexpensive acrylic sheets at Home Depot, which will work just as well, and
since the sheets are covered with a plastic film to prevent scratches, the
film will act as a natural release agent. I cut the sheets to overlap the openings by
several inches. The sheets are easy to cut: just score them
 with a special
knife, and break the over the corner of a table. I screwed the acrylic in
place over the holes and on a couple used some duct tape to keep snug
against the cabin side. with a special
knife, and break the over the corner of a table. I screwed the acrylic in
place over the holes and on a couple used some duct tape to keep snug
against the cabin side.
Then I mixed up a peanut butter
consistency of West System epoxy with 410 Microlight, low density microballs.
I just love the West fillers and Microlight gets as creamy as soft chocolate
ice cream and sands so easily. When the mixture would hold it's peaks like
cake frosting, I let it sit in the container for about 15 minutes before
continuing. Then, I filleted the edges between the inside of the cabin at
the edge of the hole and acrylic panel, smoothing the mix with a putty
knife. The mix fills any gaps at the edges of the hole and when it kicks, it
provides the adhesive to hold the first layer of woven roving in place on
the vertical cabin side.
 I
let the mixture sit another 15 minutes or so and then began coating the
first layer of cloth with epoxy. Here you can see basically how I do it. I
use sheets of wax paper to keep the epoxy off everything and provide a
carrier for the cloth I'm wetting out. Once the wet out is complete, I let
it sit about 15 minutes before taking it into the boat. I
let the mixture sit another 15 minutes or so and then began coating the
first layer of cloth with epoxy. Here you can see basically how I do it. I
use sheets of wax paper to keep the epoxy off everything and provide a
carrier for the cloth I'm wetting out. Once the wet out is complete, I let
it sit about 15 minutes before taking it into the boat.
 By
this time, the fillets have started kicking and when I lay the wetted out
cloth over the fillets a chemical bond forms. I use a roller to roll out any
air bubbles--like rolling pie dough, from the center out to the edges. I
also use the roller to press into place any small fibers. If I use my
fingers, more sticks to my gloves than sticks to the glass; the roller
prevents any lift off. In a matter of 3 hours I laid up three layers of the
24 oz roving onto the four smaller port holes repeating the same procedure
for each layer: waiting until the layer had started to kick before adding
another layer. I will do the remaining dog house holes this coming weekend. By
this time, the fillets have started kicking and when I lay the wetted out
cloth over the fillets a chemical bond forms. I use a roller to roll out any
air bubbles--like rolling pie dough, from the center out to the edges. I
also use the roller to press into place any small fibers. If I use my
fingers, more sticks to my gloves than sticks to the glass; the roller
prevents any lift off. In a matter of 3 hours I laid up three layers of the
24 oz roving onto the four smaller port holes repeating the same procedure
for each layer: waiting until the layer had started to kick before adding
another layer. I will do the remaining dog house holes this coming weekend.
This weekend I concentrated on
finishing up the port holes. Each of the eight now has three layers of
stitched woven roving epoxied in overlapping layers. Next weekend I will
sand the outside of each port hole and fill any irregularities. The next
step inside the boat will be to cut and shape 3/4 Styrofoam to the cabin
sides, glue it in place, and then fit 1/4 cherry plywood over the Styrofoam.
then the cabin sides will be ready to cut for the new ports.
Adding knees to strengthen
the cabin top
I fashioned two knees today--and will
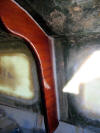 make
a smaller one as well--to brace the cabin top. It is probably overkill, but
I like the sturdy look they transmit to the cabin, and more importantly,
they break up the cabin sides, especially the starboard side into less than
8' sections, so I will not have to do an edge joint for the plywood sides.
I cut the knees from the dinette table I made about a decade ago, of a full
1" thick mahogany. The knees are bedded in thickened epoxy. I will trim off
the bottom when I finish the cabin sides and build the drip rail. make
a smaller one as well--to brace the cabin top. It is probably overkill, but
I like the sturdy look they transmit to the cabin, and more importantly,
they break up the cabin sides, especially the starboard side into less than
8' sections, so I will not have to do an edge joint for the plywood sides.
I cut the knees from the dinette table I made about a decade ago, of a full
1" thick mahogany. The knees are bedded in thickened epoxy. I will trim off
the bottom when I finish the cabin sides and build the drip rail.
Leveling
the Boat
When Tom Wagner deposited the Bristol
in my side yard I did a pretty good job of getting her level, but over the
last year the aft blocks under the keel have settled into the yard a bit and
I needed to get her dead level again before starting any construction
inside. The subject of level on a boat is always a relative thing. First of
all she's likely to be level only on jack stands, since stores and tankage
affect her in the water even to a slight extent. And, back in the 1960's it
is unlikely to expect that the yard would level the hull absolute or build
square what little can be said to be square inside the multiple curves of a
sailboat. But I figure if I get the amidships corner post vertical athwartships and fore and aft, then it will be my reference for leveling
everything else in the boat. So I put a level on both sides of the post, and
as
 I
guessed she had indeed settled a little aft and to starboard. I
guessed she had indeed settled a little aft and to starboard.
Now leveling the Bristol 29 has to be
done by shimming the keel blocks, not cranking up on the jack stands--the
 latter
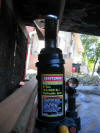
will only deflect the hull. So I used a 6-ton hydraulic jack that I use on
my Suburban. It works, albeit barely, to lift the boat. The B29's keel is
perfectly flat on the bottom and very wide, about 9 inches. So when
lifting, use a stout piece of wood at least as long as the keel's width--I
used a scrap of teak. And, latter
will only deflect the hull. So I used a 6-ton hydraulic jack that I use on
my Suburban. It works, albeit barely, to lift the boat. The B29's keel is
perfectly flat on the bottom and very wide, about 9 inches. So when
lifting, use a stout piece of wood at least as long as the keel's width--I
used a scrap of teak. And,
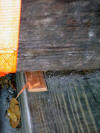 as
you can see in the jack picture I used an old 1/4"-thick stainless
chainplate to spread the load. I lowered the bow by about a 1/2 inch and
shimmed the starboard side of the keel block. The strapping is simply a
precaution in case the old railroad tie I used as a block beings to split
from the weight of the boat. as
you can see in the jack picture I used an old 1/4"-thick stainless
chainplate to spread the load. I lowered the bow by about a 1/2 inch and
shimmed the starboard side of the keel block. The strapping is simply a
precaution in case the old railroad tie I used as a block beings to split
from the weight of the boat.
Thickening the Cabin Sides
(April / May, 2006)
 B29's
have only about 1/4 thickness in the cabin sides and the ports I purchased
need 1-1/4" of thickness. So I glued sheets of 3/4" Styrofoam to the insides
of the cabin sides and B29's
have only about 1/4 thickness in the cabin sides and the ports I purchased
need 1-1/4" of thickness. So I glued sheets of 3/4" Styrofoam to the insides
of the cabin sides and
 then
a finish layer of 1/4 cherry ply. The work is easy: I simply slathered on a
layer of thickened epoxy to the Styrofoam and wetted out the fiberglass with
epoxy, and glued the two together; braced with some boards until the glue
kicked. As you can see in the picture I caulked around the edges of the foam
with thickened epoxy as well. then
a finish layer of 1/4 cherry ply. The work is easy: I simply slathered on a
layer of thickened epoxy to the Styrofoam and wetted out the fiberglass with
epoxy, and glued the two together; braced with some boards until the glue
kicked. As you can see in the picture I caulked around the edges of the foam
with thickened epoxy as well.
Preparing for the Rain Gutters
Before added the cherry plywood to the
inside of the cabin sides, sandwiching in the Styrofoam, I needed to build
the rain gutters. The gutters are troughs that run along the inside bottom
edge of each cabin side to catch water that collects in the closed
ports--when you open the port, the water runs into the trough and can be
dried with a sponge or left to evaporate. The importance of the gutters is
it contains the water and keeps it off everything else. I decided to build
them as simply as possible. The gutters consist of two pieces, a horizontal
plate of 3/4" cherry that screws and glues to the underside of the side deck
and extends inward 3/4'; and a vertical face about 1-1/2 inches tall, like a
fiddle, that fastens to the edge of the horizontal plate, Since one of my
projects is to panel the interior in cherry and In order to make everything
fit exactly, I also needed to add the cherry planking to the vertical
surfaces that define the ends of each gutter: The two aft cabin sides, the
saloon port main bulkhead, and the new starboard bulkhead I built that
creates the aft vertical side of the new hanging locker.
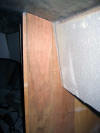 The
planking is planed to 3/8" from cherry planks I first resawed with my band
saw, and are 4" wide. Here you can see the first two planks installed
against the starboard hanging locker bulkhead. The planks are encapsulated
in epoxy, The
planking is planed to 3/8" from cherry planks I first resawed with my band
saw, and are 4" wide. Here you can see the first two planks installed
against the starboard hanging locker bulkhead. The planks are encapsulated
in epoxy,
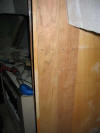 glued
and screwed in place. After the epoxy kicks, the screws are removed and the
holes will be plugged later. The planking glued
and screwed in place. After the epoxy kicks, the screws are removed and the
holes will be plugged later. The planking
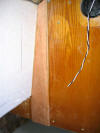 (sometimes
referred to as ship's lath if there is an overlapping edge routed into the
board) in this case is only edge butted. I bullnosed the planks slightly
with a sander to ease the visual effect of he slight differences in the
butted edges. I think after the planks are epoxied and finished in satin
System Three LPU, the effect will be very shipy and pleasing. Of
course, the most important element in adding the planking is to ensure that
it is absolutely vertical. (sometimes
referred to as ship's lath if there is an overlapping edge routed into the
board) in this case is only edge butted. I bullnosed the planks slightly
with a sander to ease the visual effect of he slight differences in the
butted edges. I think after the planks are epoxied and finished in satin
System Three LPU, the effect will be very shipy and pleasing. Of
course, the most important element in adding the planking is to ensure that
it is absolutely vertical.
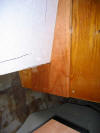 |
Starboard aft cabin trunk. |
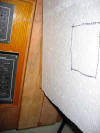 |
Port aft cabin trunk. |
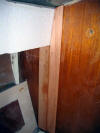 |
Port saloon bulkhead. Note
the gap at the bottom of the two planks--I will raise the settee
height this amount when the new interior is added. |
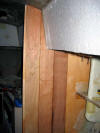 |
Starboard locker bulkhead. |
 |
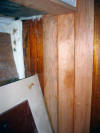
The base for the gutter
rough fitted under the port side deck. It extends out from the
Styrofoam side about 1/2". |
 |
Here is the startboard
gutter base looking foward. |
 |
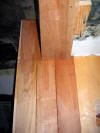
A view looking up and
forward at the base under the port side deck. |
 |
A similar view looking up
and forward under the starboard side deck. |
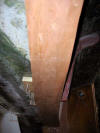 |
And a view of the longer
starboard base looking aft. |
Making Plugs and
Patterning for the Cabin Sides
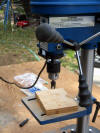 If
you have one of these--even a cheap drill press like this (from
www.cumminstools.com for
$39.00)--you can make your own plugs. This is not only cheaper than buying
them, but making them from the wood you are plugging means the color and
grain will match almost perfectly. Notice the plug cutter attached. You make
plugs all day with this, but you can't do it with a hand-held drill; don't
even try. If
you have one of these--even a cheap drill press like this (from
www.cumminstools.com for
$39.00)--you can make your own plugs. This is not only cheaper than buying
them, but making them from the wood you are plugging means the color and
grain will match almost perfectly. Notice the plug cutter attached. You make
plugs all day with this, but you can't do it with a hand-held drill; don't
even try.
First save your scraps,
 you
will need to turn them into Swiss cheese like this. If you want to really
make your plugs disappear, cut off a sliver from each board you will be
drilling and plugging and make your plugs right then--how much more anal can
you get than that! you
will need to turn them into Swiss cheese like this. If you want to really
make your plugs disappear, cut off a sliver from each board you will be
drilling and plugging and make your plugs right then--how much more anal can
you get than that!
The bag on the left: free. The bag on
the right: about $7.00.
 Once
the plugs are made, use a forstner bit to make a perfect hole--a regular
counter sink will chew up the edge of the hole--not very pretty. Epoxy the
plug in if you don't ever plan to remove it; otherwise use some varnish to
glue it in place. Once dry, cut it off flush with a flexible Japanese saw,
sand, and you're done. Once
the plugs are made, use a forstner bit to make a perfect hole--a regular
counter sink will chew up the edge of the hole--not very pretty. Epoxy the
plug in if you don't ever plan to remove it; otherwise use some varnish to
glue it in place. Once dry, cut it off flush with a flexible Japanese saw,
sand, and you're done.
 I
began cutting the cherry plywood from the patterns I made. I have a cheap
Skill saber saw and it became apparent I needed something better for this
beautiful wood. So I made a trip to Home Depot and found the wonderful I
began cutting the cherry plywood from the patterns I made. I have a cheap
Skill saber saw and it became apparent I needed something better for this
beautiful wood. So I made a trip to Home Depot and found the wonderful
 Bosch
saber saw for 119.00. This model is an older model, but is a dream to
cut with. Unlike the Skill saw which splintered the plywood badly, the Bosch
goes through the thin plywood with zero splintering, as if the cut was made
by a Freud saw blade. You can see some of the Bosch
saber saw for 119.00. This model is an older model, but is a dream to
cut with. Unlike the Skill saw which splintered the plywood badly, the Bosch
goes through the thin plywood with zero splintering, as if the cut was made
by a Freud saw blade. You can see some of the
 scrap
from the job here. Notice how clean the cuts are. The saw is very
controllable and let me shave off a frog's hair to fit the cabin side pieces
exactly, Notice in this last picture the width of the scrap. scrap
from the job here. Notice how clean the cuts are. The saw is very
controllable and let me shave off a frog's hair to fit the cabin side pieces
exactly, Notice in this last picture the width of the scrap.
Preparing the Plywood Cabin Sides
After cutting the plywood to fit the
patterns, I decided to finish them off the boat. I began by applying two
coats of epoxy to the exposed face, and two coats to the bottom edge to
thoroughly saturate the end grain of the plywood against any possibility of
water intrusion.
 I
then wet sanded the epoxied surface smooth with 600 wet or dry. I have found I
then wet sanded the epoxied surface smooth with 600 wet or dry. I have found
 using
wet or dry much easier than starting with a coarser sandpaper. the wet or
dry cuts better and leaves a better prepared surface for finishing. The
following weekend I applied two coats of using
wet or dry much easier than starting with a coarser sandpaper. the wet or
dry cuts better and leaves a better prepared surface for finishing. The
following weekend I applied two coats of
 SystemThree
clear satin LPU to the inside surfaces. If you have been following this
wetsite, you know I have used this system of paint on the spars. It is
water-based, and SystemThree
clear satin LPU to the inside surfaces. If you have been following this
wetsite, you know I have used this system of paint on the spars. It is
water-based, and
 I
simply can't give anything but praise for it and the results. As you can see
in this picture, when it goes on even with a foam brush, it looks ridged and
appears as if it won't level correctly. However, as it dries it levels to a
perfect as sprayed finish, as shown in the following pictures. I
simply can't give anything but praise for it and the results. As you can see
in this picture, when it goes on even with a foam brush, it looks ridged and
appears as if it won't level correctly. However, as it dries it levels to a
perfect as sprayed finish, as shown in the following pictures.
    |
